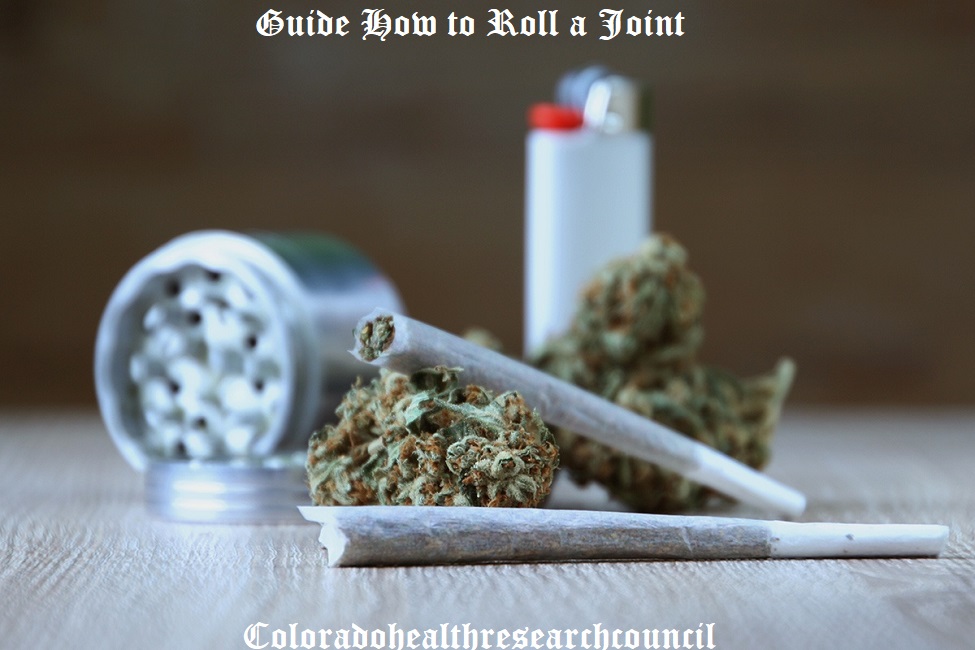
Smoking a joint is an easy, convenient way to smoke cannabis. It may seem tricky at first, but once you get the hang of it, rolling a joint will be a breeze.
Apprehensive about rolling a joint? Have no fear; our concise step-by-step guide will teach you exactly what to do, with tips, tools, and recommendations to make the process easier.
For maximum enjoyment of a prime strain of cannabis, knowing how to roll the perfect joint is key. For a smooth smoke, it should have a shape that allows it to burn evenly. Rolling a good one takes skill, but we will gladly show you how to get the hang of it. Additionally, we have some useful recommendations for rolling papers and tools to make it easier. By following our step-by-step guide below, you will master the art of rolling joints in no time.
WHAT YOU’LL NEED TO ROLL A JOINT
Before we get started with the instructions, here’s a list of what you’ll need:
• Your favourite strain of weed
• Rolling papers
• Crutch/filter
• Pen or similar object, to pack the joint
• Grinder
• Rolling tray
STEP 1: BREAK UP YOUR MARIJUANA
If you are using high-grade cannabis such as ours, simply feeling it between your fingers will begin to release its sweet smell. Although you could go at it with your hands, we recommend breaking your bud up into a suitable size using a quality grinder. This method saves time, plus it will prevent your fingers from getting too sticky to roll the paper later. You want to render your bud down into small particles, but not into dust. This will allow for optimal airflow and burn rate.
STEP 2: CREATE A CRUTCH FOR THE JOINT
A crutch is basically a mouthpiece for your joint, also referred to as a filter or tip. Some smokers may say a crutch is unnecessary or optional, but we strongly recommend it. A crutch:
• assures the end of the joint remains open
• prevents you from burning your fingers or lips while smoking
• prevents anything from falling out of the joint
• keeps the shape of the joint sturdy
• makes smoking easier by increasing airflow through the joint
You can make crutches out of thick paper or thin cardboard, like most business cards are made of. For long rolling papers, a piece of approximately 5.5 x 1.7cm will suffice. You can also buy special crutch paper, and many rolling papers already come with some.
While a lot of people simply roll the crutch paper into a cylinder, this method leaves a hole that might let weed fall through or get pinched closed while smoking. Therefore, it’s better to make a few accordion folds at one end before rolling the rest completely around it. Make as many folds as you want the width of the final crutch to be.
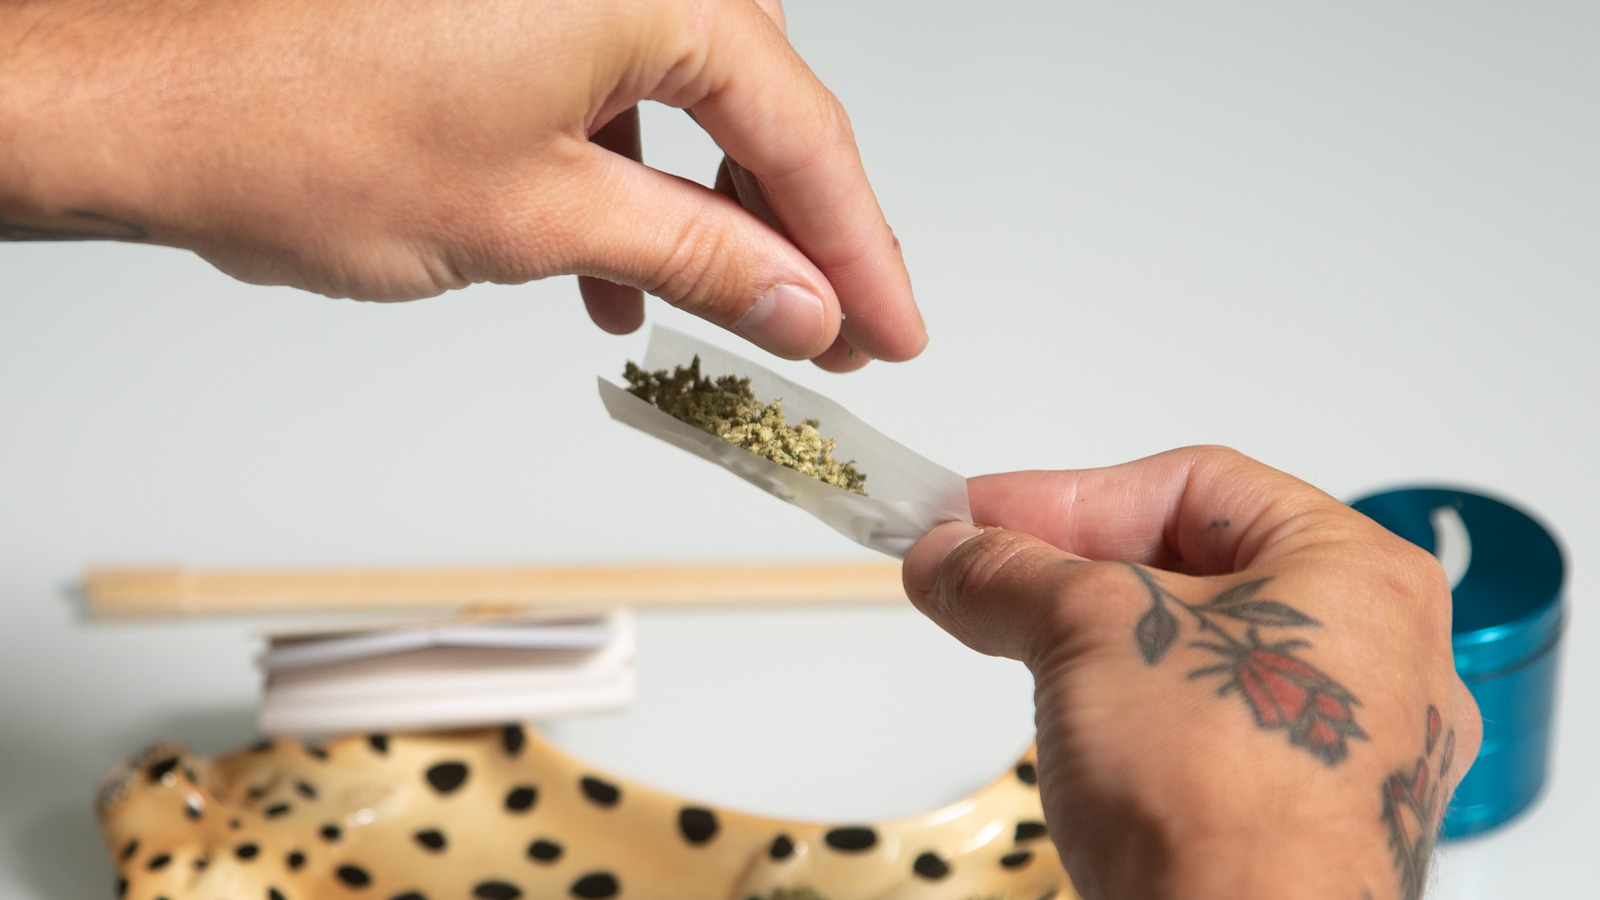
STEP 3: FILL UP YOUR JOINT
There are many types of rolling papers—have your pick. We recommend our organic hemp papers because they’re thin yet sturdy, assuring your joint burns evenly and the aroma of your strain is unaffected. Moreover, they come with filter papers as well.
Take out your rolling paper and hold it so the glue side is facing your feet and the fold is in your direct sight. Fold the paper gently in the opposite direction and roll it between your fingers gingerly until it retains the shape you need.
Place the cannabis in your paper with one hand, distributing it in such a way that there is less at the end where the crutch is going to be. You want to end up with a cone-shaped joint later. Straight joints are easier to roll, so for your first attempts, this is fine too. Ultimately, a cone-shaped joint will offer a way smoother smoke.
Holding your paper containing the cannabis, start rolling it gently as you move your fingers from left to right to distribute the particles evenly. Insert your crutch from Step 2 into one end of the paper and then get to rolling. Make sure your fingers are near the filter. The closer together they are, the better.
Roll the paper back and forth to ensure the edge of the paper crosses over the crutch. You’re on your way to the perfect joint now! To make things easier, you can use our handy wooden rolling tray. It’s the perfect size for rolling joints and will catch any cannabis that might fall out. This way, you won’t need a table as you can just sit the tray on your lap.
STEP 5: LICK AND SEAL YOUR JOINT
Once you’ve rolled back and forth enough for the shape of the joint to appear, it’s time to close and seal it. Continue rolling between your fingers until the paper is pulled tight and the edge can be easily folded in with the tip. Roll until the glued side is just tucked slightly underneath the unglued side. Then, lick thoroughly through the outer layer to hit the glue layer, sealing up the sides and leaving the end open.
Make sure you do the tucking and sealing along the length of the joint slowly and gently. To prevent smoking too much paper, you can burn off the excess after sealing it. You don’t want to seal it up too tight, as it will be very hard to draw in smoke and take a hit. If it’s rolled too loose, though, it will burn unevenly or too quickly.
STEP 6: PACK YOUR JOINT
To ensure a smooth and even burn, you should now pack the joint. Use the pen (or any other object that will do the trick) to carefully press down the cannabis through the open end. You can also put back in anything that fell out earlier, or simply save it for another time. While holding the joint upright from the filtered end, gently tap it on a flat surface to compact the cannabis and push the crutch in for reinforcement.
STEP 7: TWIST THE END OF YOUR JOINT
Seal the open end by twisting the extra paper so it resembles a candle wick. This way, there is no possibility for any weed to fall out. You can keep your joint stored away like this if you are not going to smoke it right away. Once you are ready to smoke, the twisted end will be your lighting point.
STEP 8: LIGHT AND ENJOY
At this point, you are ready to indulge in your smoke. Now there is nothing between you and the sweet cannabis you just rolled. All you have to do is light it and enjoy. Your joint tastes the best the first time it’s lit. Therefore, try to smoke it all at once and not relight it. Relighting is bad for the taste, and we want you to enjoy every single puff so you get the most from your buds.
STEP 9: SHARE YOUR JOINT
For an even better experience, share your joint with some friends. Not only will it prevent you from having to relight it later, but you will have the chance to really take in its aroma and effects while you are waiting in-between turns. Lastly, it’s just a lot more fun to enjoy the high with your mates. Good times ahead!
Choose your rolling paper.

Choose thin rice or wheat straw paper in standard or king size. Plan to tear your paper down to size–wide and square is a good starting shape that offers versatility. You can get papers online, in convenience stores, at your dispensary, or at tobacco shops.
- Look for papers that burn slowly, evenly, and won’t give a bad flavor. Some good papers to use include RAW natural hemp rolling papers, Smoking brand papers and orange Zig-Zags (if you’re feeling old-school).
- If you plan to carry your papers around with you, get a rolling paper protector. Put your rolling papers in this metal case to prevent them from bending and tearing.
- Carry salespeople add tobacco, leaf or another herbal smoking mixture to the bud so it can “breathe” in tflowering-tops, and the worst is full of chemicals. Hash(use Premium Afghan Hash if you are looking for something special) is normally heated with a flame, crumbled into a powder and then mixed with tobacco or herbal smoking mixtures.
- Use hashish with care. Some users experience adverse reactions that range from mild anxiety to severe panic. Paranoia is possible and, although rare, acute psychotic reactions can occur
- Resin oil. Genuine resin oil is very hard to come by and is incredibly potent. It comes in the form of a black, brown or transparent oily fluid that gets smeared across the rolling papers or blended into the mix. If you have a membership with a dispensary, you can probably purchase oil contained in syringes.
- Kief. As mentioned earlier in the article, kief is a term for the resin glands of the cannabis plant that are rich in THC. Sprinkle some kief, either over the marijuana before rolling, or on the joint after rolling, to give it an extra boost of psychoactive THC.
Make the filter tip.
- This is a piece of index card that’s inserted into the end of a marijuana cigarette. It prevents a marijuana cigarette from clogging up, keeps pieces of marijuana from falling out, allows the smoke to flow through, filters out a little tar and stops a marijuana cigarette from dissolving in your mouth when it burns down to the end. Tear a thin strip from an index card or business card. Fold it three times to make a pleat and roll the rest of the unfolded filter around the folded. It should look like a “W” in a circle.
- The width of the roach is a matter of personal preference. Wider ones let more smoke through, which produces a rougher smoke, while thinner ones cool the smoke but run a greater risk of clogging. Shoot for somewhere in the middle.
- Some smoking shops sell little booklets of ready to use filter tips, which generally consist of little strips of hardened paper neatly cut to size. Alternately, you can buy cellulose filter tips like those used in tobacco cigarettes. These can be found at smoking shops and probably your dispensary.
- Although some people refer to the filter tip as a “roach”, this is incorrect. A roach is the tip of the joint that is left over after smoking. They’re related, but not always the same thing.
Roll the joint.
There are several ways to roll a basic joint; the method depicted below is a freestyle roll.
- Tear out one of the papers from the booklet and fold it in half lengthwise being sure the side with the glue is up.
- Twist one of the bottom corners of the paper. This will be the front.
- Place the marijuana inside. Distribute it evenly along the length of the paper to ensure an even burn.
- Don’t overload it or the joint won’t close properly. On the other hand, don’t be stingy with the mix or you’ll end up with a “pinner.”
- Pick everything up and roll it back and forth until the mix in the rolling paper is evenly dispersed and cylindrical in shape.
- Lay the filter down in the center at one end of the joint. Putting the filter in before rolling saves hassle and makes it more likely that you’ll get a perfect fit.
- Proceed to tuck and roll up the back half of the joint.
- Lick the sticky strip of the paper and seal the joint. Lightly twist the end of the joint to keep the contents from falling out.